Learn
- Basics
Dates
in Firearm History
Frequently Asked Questions
Evaluating
History of a Gun
Article
by Jim Supica
Military Holsters
(Under Construction)
Learn - Advanced
Factory
Letters
And Military Records
Museums With Arms Exhibits
Arms
Collector Groups
Other
Useful Links
Book Recommendations
Book
Reviews
Specialties
U.S. Military Arms
Factory
Letters
And Military Records
Krag
Bolt Removal
Which
U.S. Bayonet?
M1917 Enfield Parts
Markings
(from M1903.com)
M1917 Enfield Sling Instructions
M1
Garand Disassembly and Parts
(from CivilianMarksmanship.com)
Cartridges
and Ammunition
International
Ammunition Association
CartridgedCollectors.org
Corrosive Primers change to Non-Corrosive- Dates
Edged
Weapons
Society
of American Bayonet Collectors
BayonetCollectors.org
Recommended
Dealers
OldGuns.net
Manufacture Dates
Pre-1899
Antique
Serial Numbers
(From Empire Arms. Use at own risk.)
Remington
(From OldGuns.net)
Ruger
(& Factory Letters)
U.S.
Military
(From OldGuns.net)
Winchester
(From the Winchster Collectors)
Markings
Serial
Numbers
(foreign language)
Gun
Marks
(From OldGuns.net)
House
Brands
(From OldGuns.net)
U.S.
Inspectors
(From OldGuns.net)
WWII
German
Codes & Markings
(From OldGuns.net)
Warnings
Spotting
Fake Firearms
Antiques Roadshow Advice
Collection
Care & Records
(Preservation tips, inventory software, insurance)
Arms / Gun Show Listings
Living
History
(Info coming soon)
Mannequins
for Uniform Display
Make them yourself!
Krag Bolt Removal and
Installation
(For U.S. models, but Danish and Norwegian
are similar)
by John Spangler
Very easy once you know how, but until you learn the secret,
it seems to be an impossible task.
Make sure the rifle is unloaded and pointed in a safe direction.
Bolt Removal
1. Open the bolt and pull all the way to the rear.
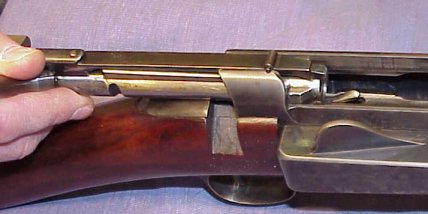
2. Hold the bolt handle with your right hand, and lift up on the extractor directly above the locking lug.
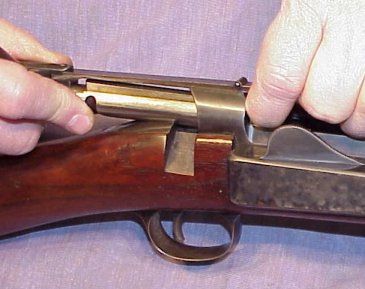
3. When the extractor has been lifted about 1/8" to 1/4" turn the bolt handle slightly to the left (open more) and pull bolt to the rear.
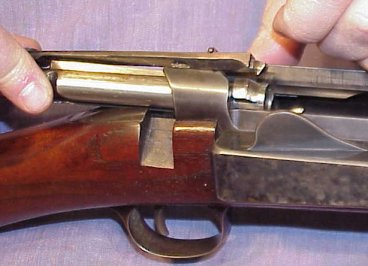
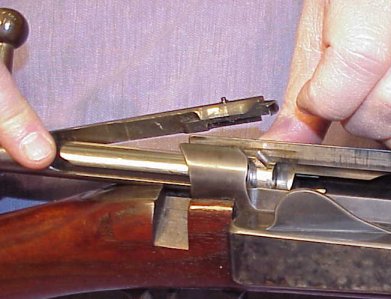
4. Pull bolt all the way out and it should look like this:
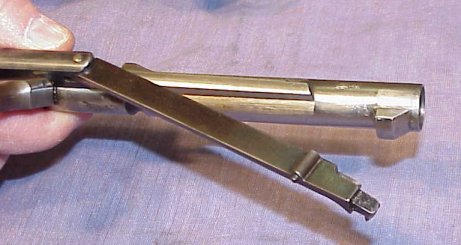
Bolt Installation
1. start with the bolt looking like this:

2. Start bolt into the receiver with the locking lug sticking up, and slide it forward. You may have to press down on the ejector (floppy thing on the bottom of the receiver) to get the bolt in far enough for the next step.
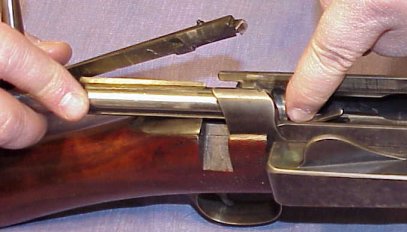
3. When the locking lug is clear of the rear part of the receiver, start to twist it to the right. While doing this, guide the extractor into position along the top of the bolt and it will snap into place.
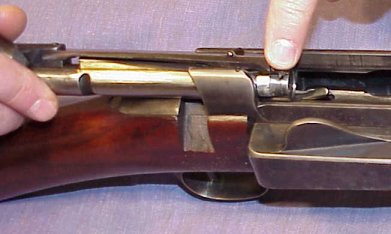
When you are done the rifle will look like this:

Rev 7/12/02